
I love my new shop. I know when it’s “done” (because let’s face it, will it EVER truly be D.O.N.E…..nope) it will be an amazing workspace. I love heading out there, I love not having unfinished work in my face at every moment, tripping over paint, and a sink full of brushes in the kitchen… I just love the space. It does however, need storage. Yes, I could find a killer armoire and fill it with paint and tools, but I will have to open the doors to find things and one day, I will reclaim it, move it along, and I will have storage issues again…
So I decided building shelving was my only hope…off to the big box store I went.
Can you imagine how it pains me to pay good money for new wood… for shelving… that will probably never be seen by any one but me…? Can you? Well.. it’s a lot. Ugh.
I loaded up a lumber cart anyway and just handed over my debit card. Boo!
Here is the wall before… it’s tucked back in the back corner of the shop. There is one bookcase on the right hand wall that is already full of products I need to figure out how to move along.. and a short bookcase in front of it with space for items I use all the time. On the left is the breaker box and electric stuff that needs to be fairly accessible and I don’t really want to block that up either…. so this back wall is just screaming for shelving. There was already an odd shelf along the bottom so freestanding wasn’t going to work. No problem!
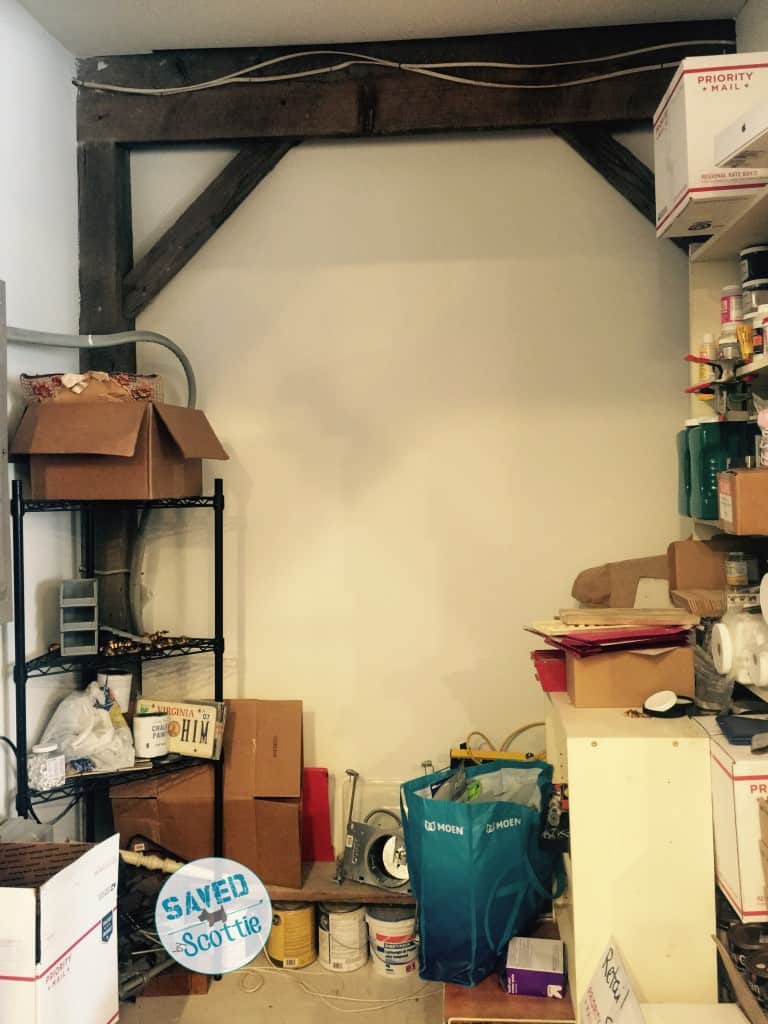
I decided on 1×6 shelves and 2×4 supports. I mounted the side supports to the beams of the barn. Wait- I can’t just do this and move on.. nope, always something funky… weird wires sticking out of the walls.. ok, so they’re not “weird” as in I have no idea what they’re for…. mostly weird like, not how it really should be done..

Oh well, a conveniently placed wood block will help fill that gap and give me something to attach the support to… Done! (of course I completely forgot the photo of JUST the wood block, so you can see it below on the left side) Measured out the shelf and popped it on top. Threw in some supports for good measure too.

….and done! I love all the colors and fabulous perfect spots for my awesome Ryobi tools! I’m in heaven..

In case you’re wondering which ones I used for this job… I cut with my One+ Jig Saw, screwed with my One+ Impact Driver, and nailed down those shelves with my favorite One+ Brad Nailer. The whole thing took about 3 hours…
I debated on painting them, but decided I like the unfinished look.. I may give them a little stain with Shabby Paints reVAX at some point… though I may just leave them like they are. It’s great to have a place for the tools that is easily accessible too! Now if I could just find the rest of them in all these boxes….
XO!
~Scottie
(While Ryobi has given me some super awesome tools to use and talk about, all opinions are my own and always will be)


2 Comments
Eliesa
March 29, 2015 at 6:10 PMI wish I had a workshop! The shelves look fabulous. Want to come help me build some?
Scottie
March 29, 2015 at 6:24 PMEliesa- is it warm there?! Then YES!! (said like Elf)