
I painted the brick. There. Go ahead and tell me what a terrible person I am. I can live with it. I could not stand the color of that blasted fireplace for so long now. I’ve lost count of the number of “plans” I had for it. Having a Designer friend over bought it all together one afternoon so much so, that I dove in on a fireplace makeover before I changed my mind.
This page includes affiliate links. If you make a purchase using the link, I may receive a commission at no additional cost to you.
This post sponsored by Ryobi Tools. I use them nearly every day and buy them myself too. I appreciate their help to bring this fireplace makeover to life and love sharing how I use them with you.
We were inspired for this by a rock- Yep. A simple rock sitting on an old buffet that was waiting to be refreshed and being used as a liquor cabinet in the meantime.

Here is the before with and without the teeny tiny mantle… (can you tell it was my least favorite feature…
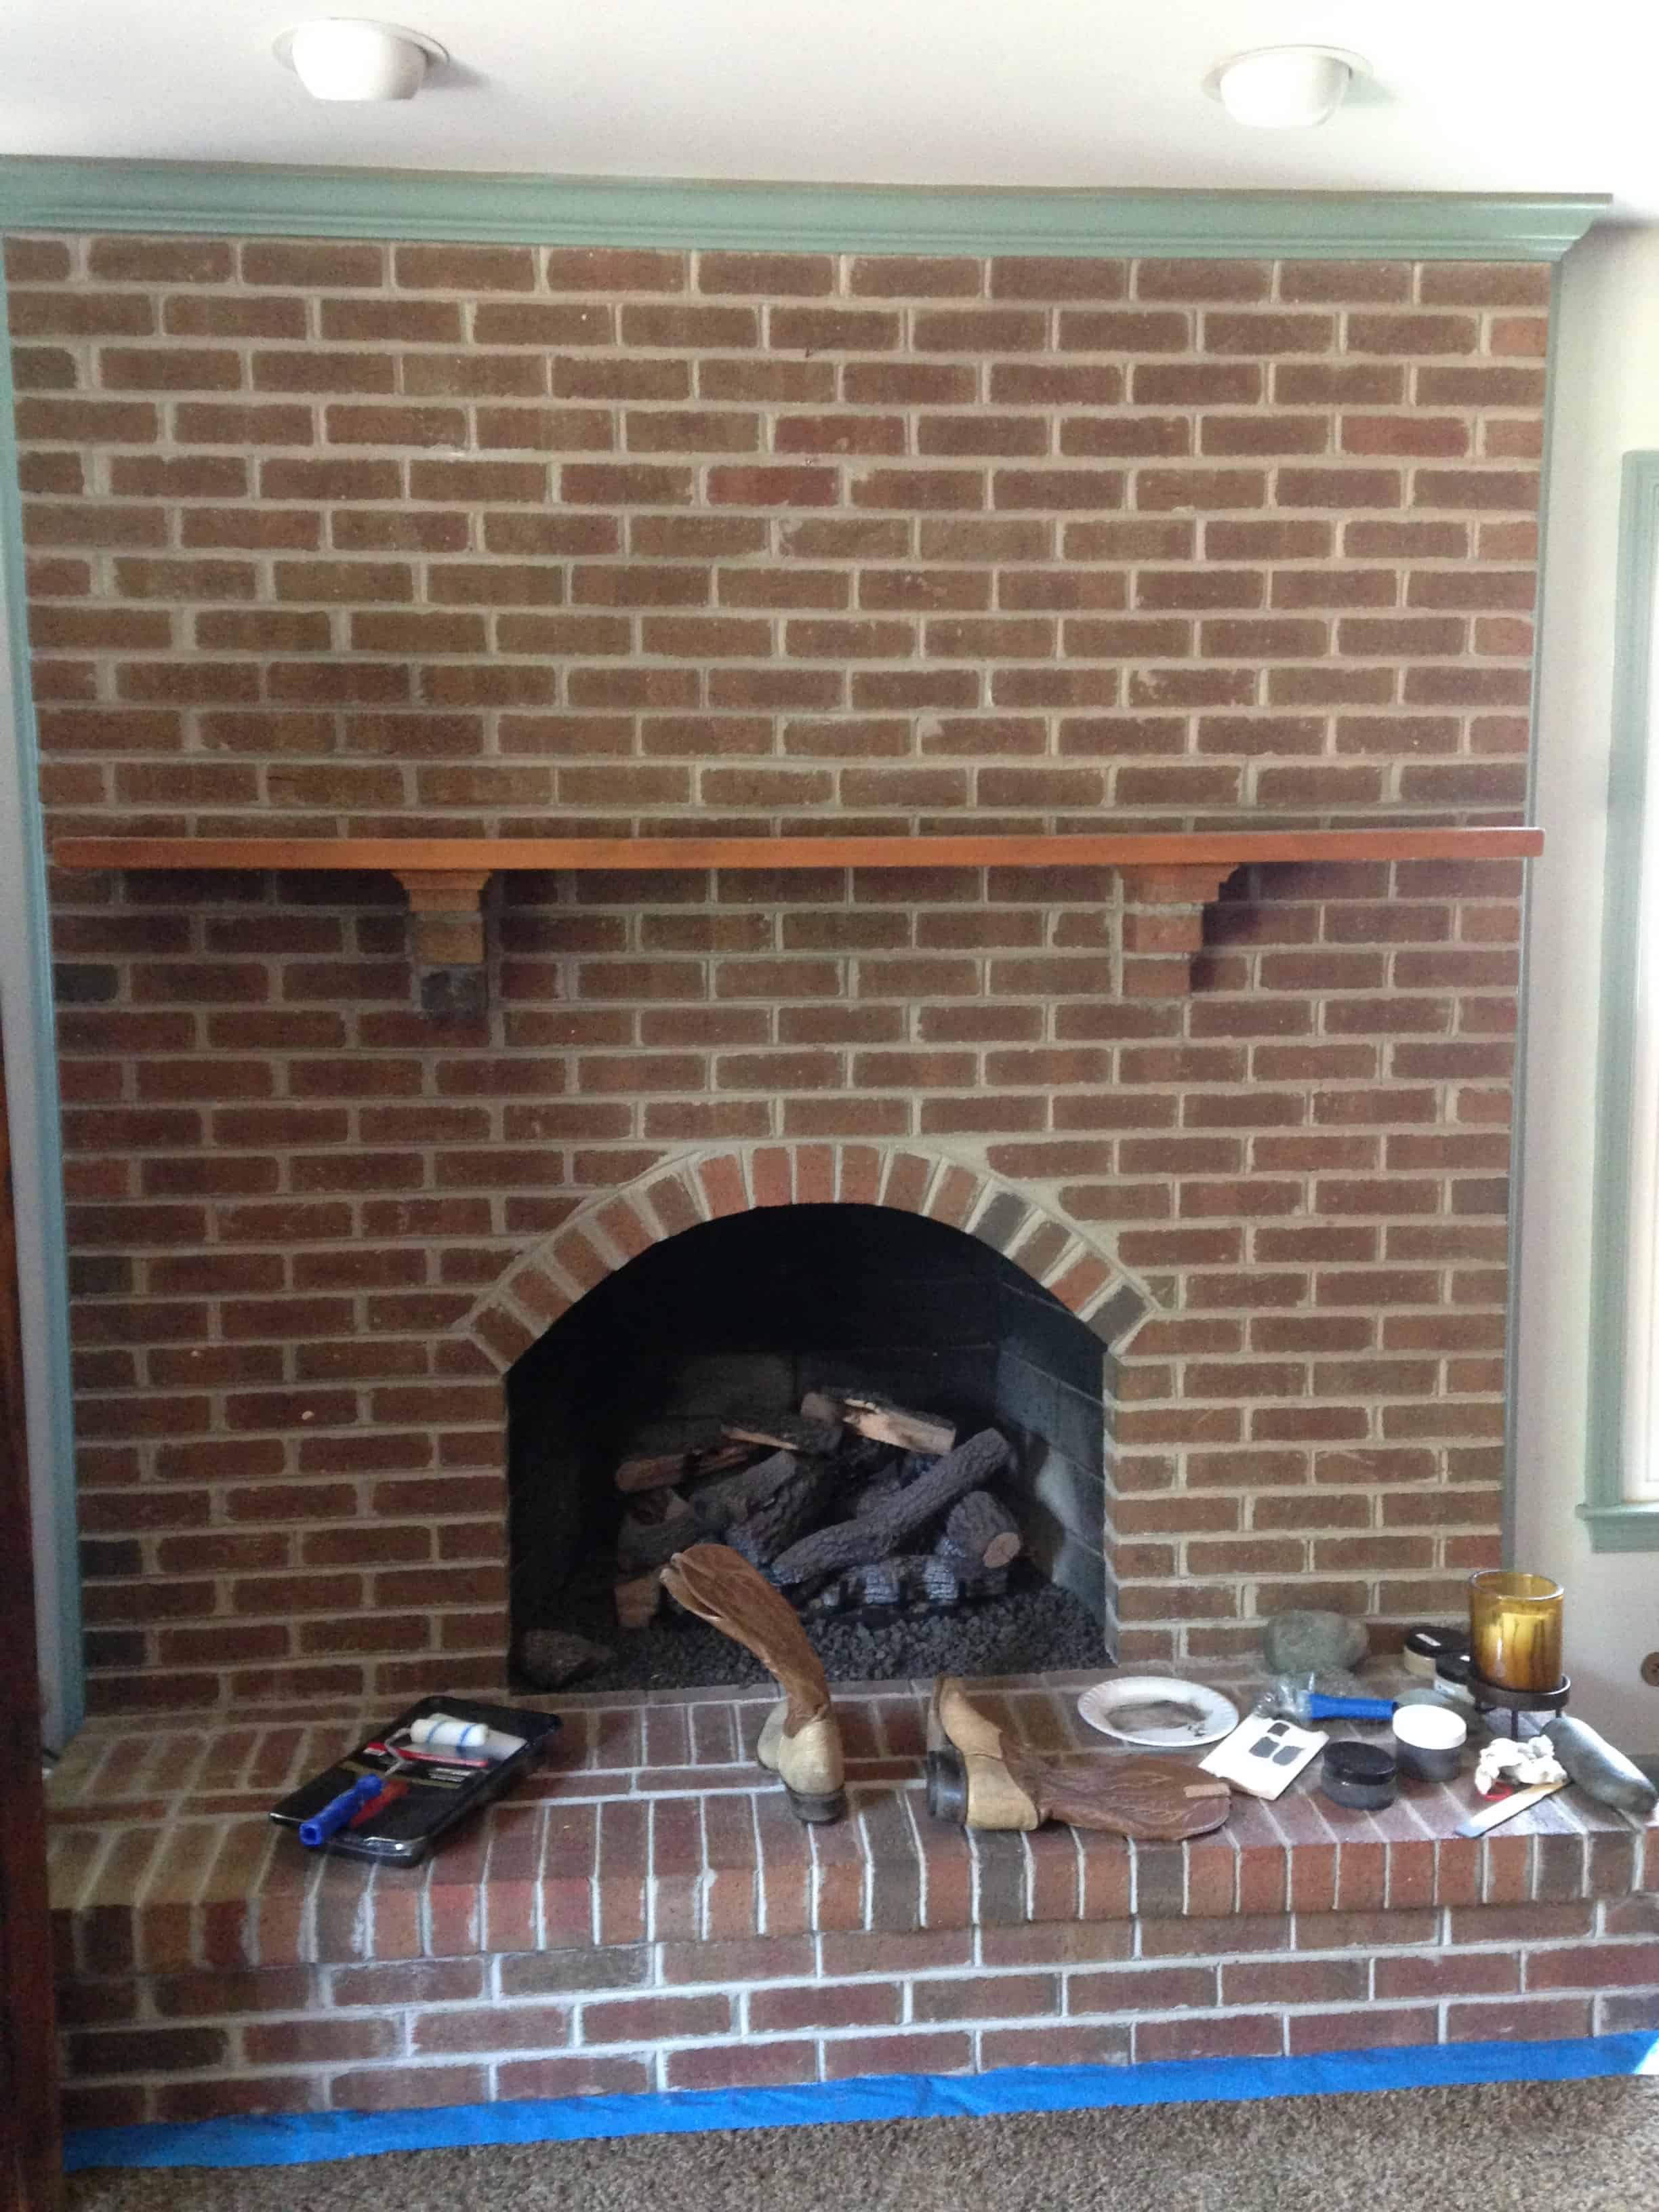
followed closely by those horrid brick supports)

First, I vacuumed the whole thing REALLY well to get all the dust and debris off the bricks. Next was a coat of paint in a neutral beige-y green color. Brick is INCREDIBLY absorbent. I was quite surprised with how much paint I used on that first coat.

I felt like the first coat make it look like bread, Seriously. It’s a fabulous color- just not on a fireplace all alone. That’s alright though.. it works great for my master plan…
I mixed a custom gray, brown, green, “stone” color then played with the depth of the color until I came up with what just seemed right and made a huge container of it.
Then I used a high nap roller to roll the darker color on top of the base and ended up with this:

Not quite right, so I started filing in the grout with a brush. (the 5 year-old took the picture and is VERY proud of it)

Which left me with that tiny mantle shelf.

ok, still no. While I would love to find a gorgeous piece of crazy thick walnut to use, that was not in the cards or the budget. So.. plan “B” I made it thicker all by myself. Ryobi One + Airstrike technology to the rescue!

My favorite tool EVER. I love this brad nailer. I can’t tell you how many times I use it and the fact that it is battery-powered is SO awesome! I don’t have to drag a huge cord or compressor around, it’s not crazy loud… seriously, I can use this during nap time and not wake up a soul!
I put a bead of glue along the edge and then nailed a 1×6 into place… Yep.. why build a brand new mantle… this one was fine and already set up perfectly. I just nailed 1×6 boards to the outside.


I was going for an industrial look for the whole room so I didn’t even have to miter the corners (didn’t that work out easy?) I caulked the edges for cosmetic purposes and once the caulk was paintable, I went to town.

I painted the wood in a light grey and when that dried, I used silver glaze to give it an amazing metallic sheen. While that was drying, I decided the fireplace needed just a bit more…. “something” and grabbed some brown glaze. I brushed it on the brick in places and then wiped it off with an old cloth.


I got so excited about the finished fireplace makeover, that I took the picture before the glaze was dry all over (The long open time of glaze means 36 hours to dry fully- who has patience to wait that long for a picture? not THIS girl!)

Next up? Painting the trim in the ENTIRE room white. Hopefully worth it in the end.. but wow, it’s sure going to take a bit.
(Ryobi supplied me with some awesome tools to share with you, though all opinions are my own… and always will be)


2 Comments
Joanne
July 2, 2014 at 8:51 PMLove it Scottie!
Scottie
July 2, 2014 at 9:01 PMThank you Joanne! Me too! SO much better! 😉