
In part 3 of the boy’s bedroom refresh series, I’ll show you how I made a feature wall from metal tile. This part of the project gets me the most excited because it really sets up the room. I love using these tiles because they are also magnetic. Pretty with a purpose is my favorite.
This page includes affiliate links. If you make a purchase using the link, I may receive a commission at no additional cost to you.
This project series is sponsored by Aspect Tiles. They make different types of DIY friendly, self-stick tiles to cover many home decor styles.
Prep
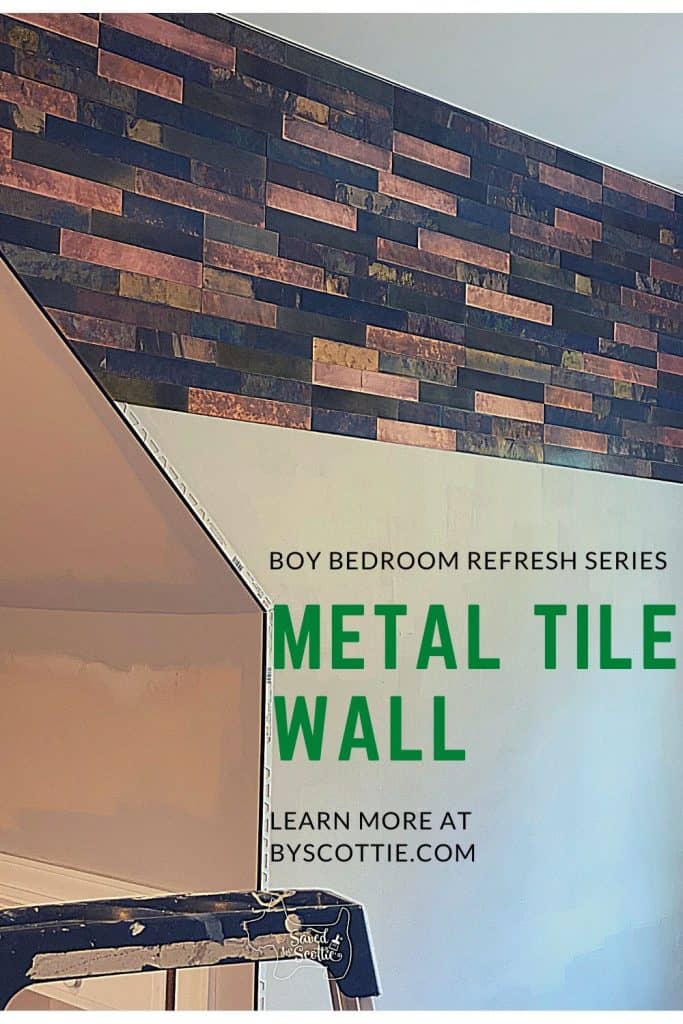
My son has this oddly shaped wall in his room. It’s on the right as you walk into his room. I knew it would be a great feature wall to tie the whole room together.

I was so excited when the tiles arrived so I could get started. The first thing you need to do is prime the wall. Any primer will work fine. This gives you an ideal surface for the adhesive to stick to. It doesn’t have to be pretty or opaque coverage. You’re just going to cover it up after all.

I also knew I had to paint the walls and didn’t want to risk getting it on the metal tile once the wall was complete. SO I quickly threw up some edge paint so it would be there when I was ready to roll out all the walls (an advantage to using a matte/flat paint)

Trim
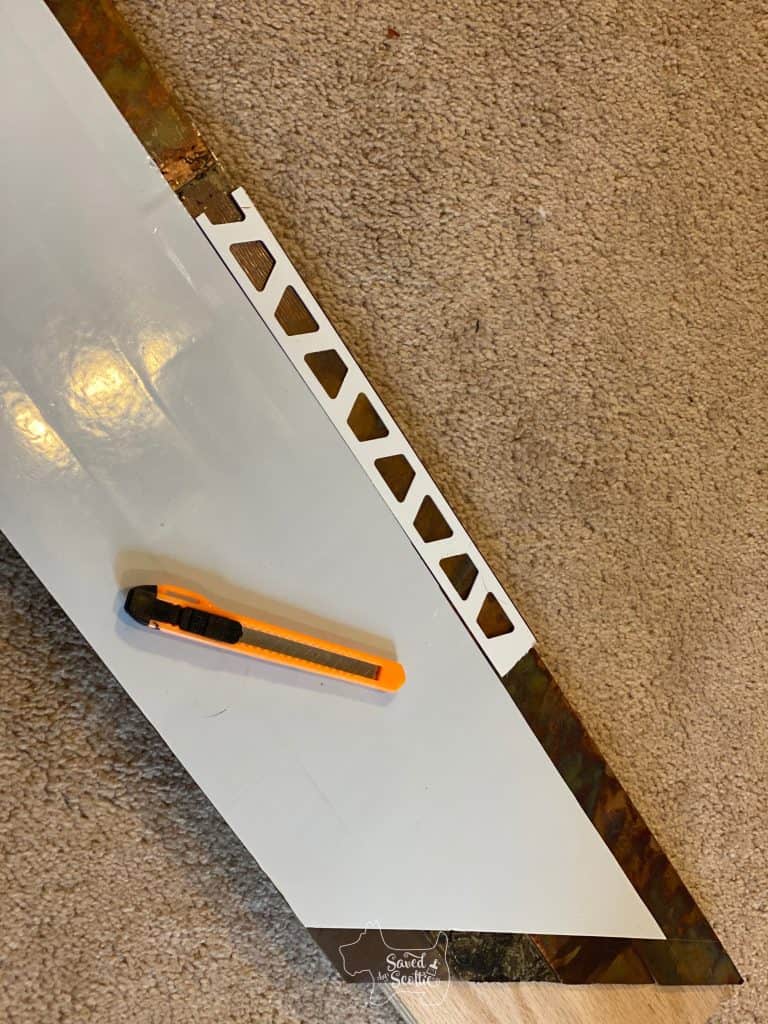
Once you cut the metal tile, the cut edges will be pretty sharp. You have a few choices: You can leave them alone and risk injury (NOT recommended at all), use a metal file to file down the edges, or put up some edge trim.
I am certain there are several kinds of trim you can use. I wanted a low profile one that would blend with the product itself, and still cover the edges, so I chose a Schluter tile trim in black pvc. There are all kinds of different styles and profiles. I liked this one because it was far less expensive than the metal version and because it’s made of pvc, it’s easy to cut as well. I ordered it direct from Home Depot and they shipped it to my house in 8 ft pieces. The only downside to this type of trim, is that you have to put it on before you start.

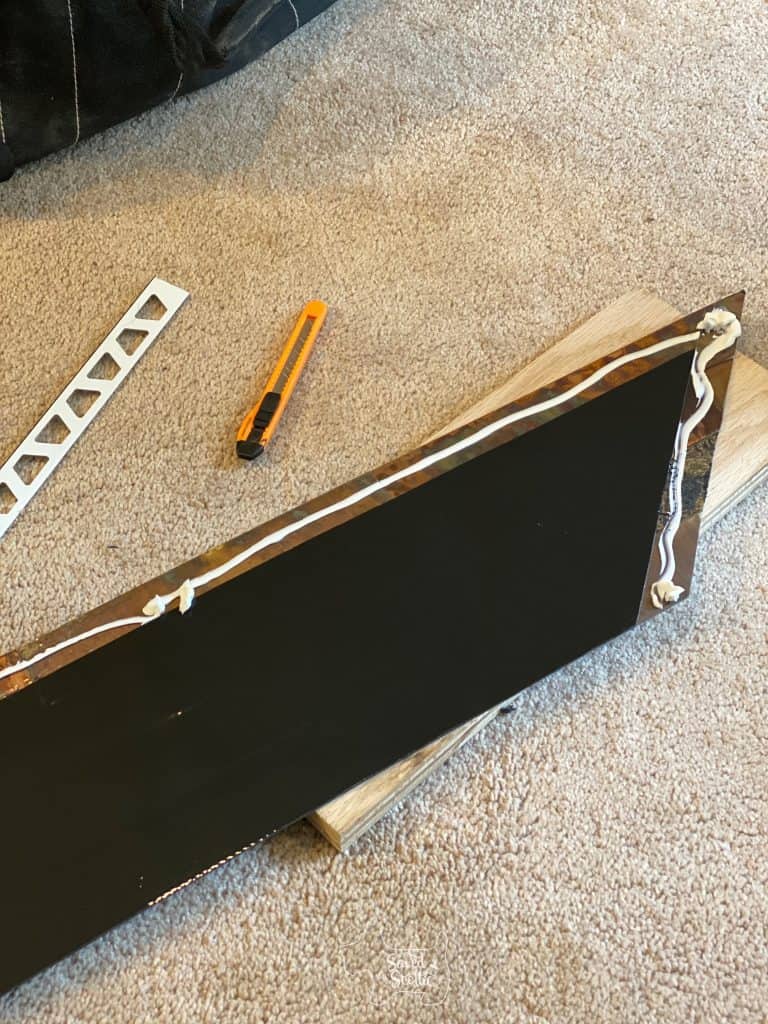
Luckily, it’s SUPER easy to install. Cut the piece to fit the space you need to put it in, then place a bead of construction adhesive along the edge.

Then press the trim in place, lining it up along the edge of the wall.


When totally finished, I gave it about an hour for the adhesive to set completely.

Metal Tile Install
Time for the metal! I used tin snips to cut the angle on that top edge. Tin Snips can leave a bit of a bend to the edge so using a mallet will straighten the edge right out.

The trim does add a bit of bulk to the surface, and I was worried about seeing the profile change when it was all finished. The adhesive on the tiles has a little bit of height to it so I decided to cut it off along the edges to make up for the trim.
A bit of construction adhesive on those edges will keep it tight against the wall and trim. All I had to do was peel off the adhesive and stick it on the wall.
After the first few rows, it was really starting to come together.

Once you get past the top section, it’s all straight cuts and goes really quickly.
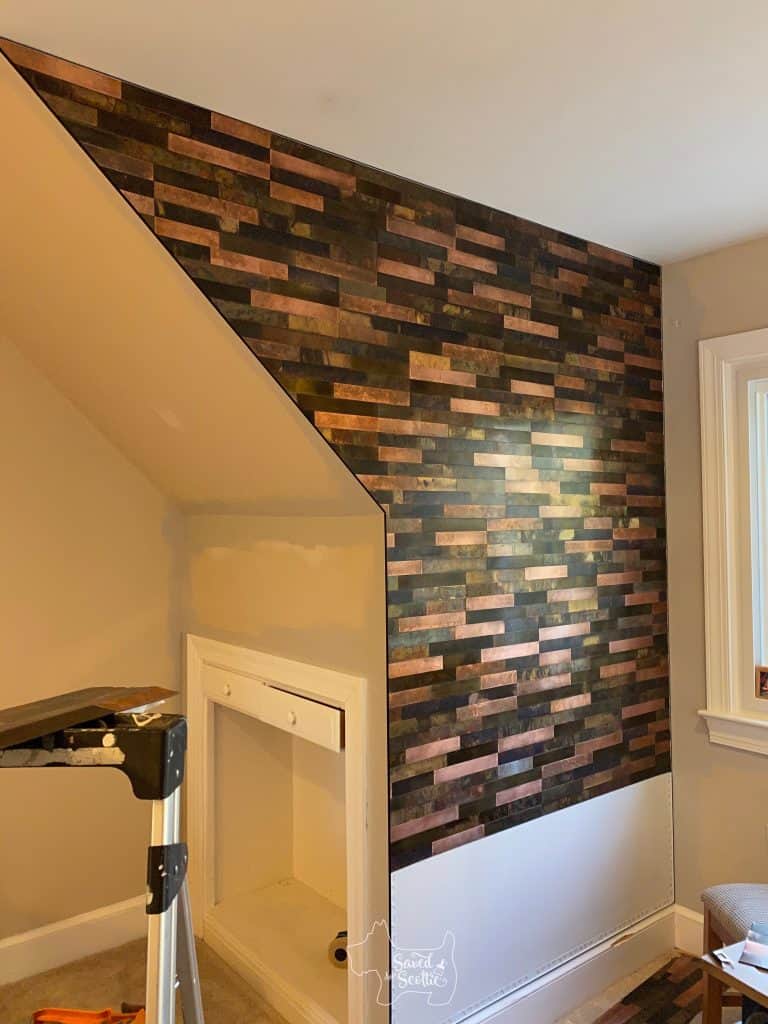
And before you know it, the metal tile wall is finished!


Once I finished painting the room, I moved the desk into its new home.
Finished


Oh! and remember I told you these metal tile are magnetic? Putting the desk there was purposeful on my part. Jack can now use that wall to put up notes, drawings, and assignments.
I bought some neat (and pretty darn strong) magnets that looked like they would work well with his new decor.

Then I had some fun with putting up a few things on the wall.
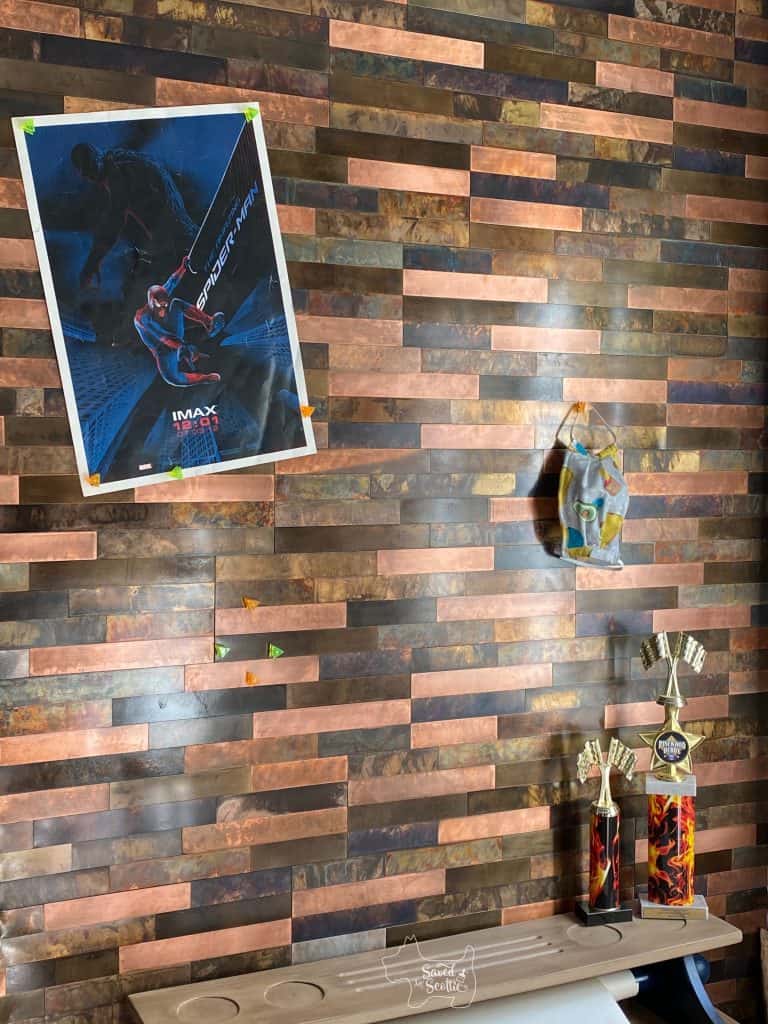

I think the metal tile wall is a great feature and the room is really coming together nicely, don’t you think?
Boy bedroom series:
Part 1 is Boy bedroom refresh and Part 2 is How to Bend Wood
Please Share and Pin this Post!


1 Comment
DIY Xbox lamp - Saved by Scottie
June 10, 2020 at 9:33 AM[…] remember it this way. When you first walk in, you see the metal tile letter, to the right is the metal tile wall, and on the left is the new […]