
On a Friday evening a few weeks ago our oldest two girls were at the homes of their other parents and the youngest two had just gone to bed. I leaned in close to my dear husband and whispered, “Honey, can I rip the carpet off the stairs to give us the painted steps I have always wanted?”. (Seriously, that’s exactly how it happened)
This page includes affiliate links. If you make a purchase using the link, I may receive a commission at no additional cost to you.
His response stopped me in my tracks- “I don’t care, go ahead.”
What?! Uh… ok. I quickly ran to the garage to get the utility knife before he changed his mind. I was in such a hurry that of course, I again forgot to take a before photo. Just imagine this- cream-ish white carpet, 20-something years old, maybe cleaned a few times… so turning a kind of grey-ish…. SUPER Sexy, right?
Digging through old photos, I did manage to find one picture. All my daughter’s friends gathered at our house for homecoming a few years ago. If you look through their legs, you can sort of see what it looked like.

Take my word for it- these steps needed help. Re-carpeting really isn’t in the cards. I am allergic to the glue they use in most carpet. It causes respiratory issues for me. The only way around it is to find a company willing to lay ALL the carpet out in a warehouse for weeks to get rid of the gasses from the glues or I move out for at least two weeks… basically new carpet was not an option. Hardwood was out of the question due to cost (ok, I’m an admitted cheapskate- I might not feel ok with paying for hardwood even if I won the lottery) so through the MAGIC of Pinterest, I decided painting them was my best, and fortunately favorite, option.
I had been thinking about how I wanted to do it for months. I had shown my husband dozens of pictures. “What do you think of these?”
“That’s nice…”
I’m sure he was just done with hearing about it, not to mention what color? Dark? Light? Rainbow? Crazy? Quotes and Sayings? What would really look like “us”?
In the end, I just opted to use the paint we had on hand. Mostly because if Brian changed his mind, I’d be disappointed. Since it was spur of the moment, I couldn’t risk the time of heading to the store.
When we’d originally painted the entryway and upstairs hall, we’d painted the banister too. We had semi-gloss paint that matched the lighter of the two wall colors on hand- and a LOT of it. The trim is all white and there is also lots of that too (for touch ups with all these children). I decided green treads and white risers made the most sense and went with it.
Tear Down
First, I took a utility knife at the top of the stairs and cut the carpet about 2 inches below the point it comes off the top step.
Tip 1: If you do this, cut at least 3-4 inches down. I had EXACTLY enough carpet to wrap under the top edge. It would have been helpful to have some “wiggle room”.
Then, I just started pulling. Ok, once you start pulling, be prepared. This part releases a RIDICULOUS amount of dust and dirt into the air. It’s disgusting. I vacuumed my stairs before I started and it didn’t help. All that dust gets ground down as you step and walk over the years, and it’s just gross- no other way to put it. WEAR A MASK.
Tip 2: Learn from my mistakes, get masking plastic and hang it up as best you can. Pulling off the carpet and sanding the wood underneath distributes a “lovely” very fine dust that floats everywhere. You’ll be cleaning this up for ages (trust me on this one, I didn’t mask anything).
Once you pull up the carpet and padding, vacuum. USE A SHOP VAC! You may ruin your regular vacuum if you use it and even if it’s brand new, I doubt this kind of fine dust will be covered under the warranty.
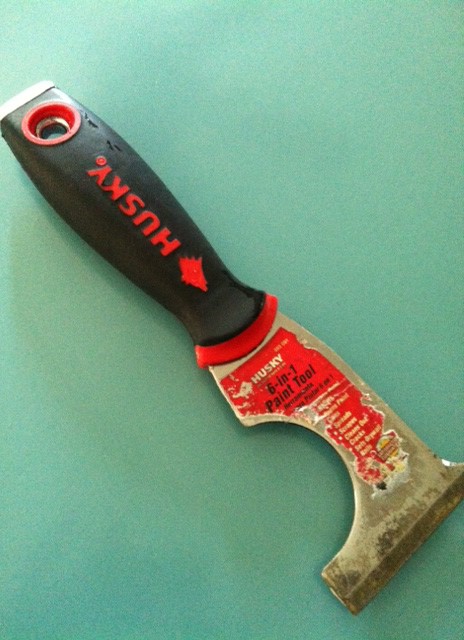
Then there will be carpet tacking strips. I of course have no photos of these either. be careful- they are sharp. I used my favorite 6-in-1 paint tool (now updated to a 14-in-1) to wedge under them and lift in such a way to bring the nail with the strip, and for the most part, not need a hammer claw.
Then I used needle nose pliers to pull up the occasional staple used for the padding and yet vacuumed again. At which point it looked like this:

Not the best wood, certainly not the worst. We’re a house of 6 people- so with a little prep, I thought they’d be fine. It was better quality than I was expecting for sure.
Even the stair treads themselves were in better shape than I thought they would be.

Repair
Some places could use some help, though luckily nothing that a little wood filler couldn’t repair. I filled and smoothed the significant dents and let it all dry (only 15 minutes or so really).
I used a corner cat sander with 180 grit sandpaper and started at the top. I sanded, and I sanded, and I vacuumed, and wiped… (I wore a mask this time) and was it ever a mess. Once I felt like the texture was probably good enough, I did one final vacuum & wipe.
Since I wasn’t using a chalk-y finish paint product, I thought priming would probably be a good idea.

After checking the dry time on the green paint, I decided I could just start at the top and work down. This paint said 30 minutes so I figured if I kept them off for an hour when I was done with the first coat, I should be golden.
Ok, normally you’re supposed to cut in with a brush, and then roll the main part before the paint dries. I was doing this by myself, and the thought of stopping and starting like that didn’t appeal to me. So I didn’t. You can decide if you think I screwed up- I honestly can’t see a line.

I started painting- I did the first step the way you’re supposed to (cut and then roll before it dries) and then I decided that took too long so I just started cutting all the steps in – and when I was done, it looked like this:


That trim obviously needed a touch up too so white painting the risers, I took advantage and did that too. The unpainted board you see on the left is our way to put up a baby gate at the bottom of the stairs without drilling into the banister and making a huge mess while possibly disconnecting the banister from the staircase as the gate pushes on it. I took it off before I started painting the trim.
After rolling out all the steps, they needed a second coat and were going to need sealant of some kind as a wear coat. I decided Minwax PolyAcrylic was easiest (and I already had some lots from the kitchen countertops). I went with the Clear Satin finish. The sealer takes at least two hours to dry. Keeping everyone off the steps for 2 hours didn’t really seem feasible so I decided to do every other step and see how that went. I put blue tape on the dry steps so everyone would know the “step-able” treads and dove in. I have learned that the PolyAcrylic seems to work and level best when you lay it on pretty thick. The can recommends a minimum of three coats. Once the first coats dries, you sand it lightly with 220 grit paper and then put on the next coat.
The Big Reveal
When complete, these painted steps looked SO much different:


Oh I should mention- to finish that top edge, I just folded the carpet under at the top and used a staple gun to attach it to the underside of the landing. I then got a piece of quarter round and painted and attached it to cover the carpeting edge.
What do you think? Would you give painted steps a chance in your home?

15 Comments
Alyssa
July 31, 2012 at 2:00 PMHave you noticed the polyacrylic is holding up well? I’m always afraid to use polyacrylic on high traffic or highly used items because I’m afraid it’ll scratch and then start peeling up more than polyurethane. Which sucks because I like polyacrylic WAY more.
scottiev
July 31, 2012 at 2:41 PMSo far it seems to be just fine and on the dining table too. I will keep an eye on it- my kids are rough on any solid surface and I haven’t noticed any issues yet.
Eliesa Prettelt
July 31, 2012 at 6:55 PMLove how bright and clean they look now! Great job!!
scottiev
July 31, 2012 at 7:15 PMThanks! The cleanliness is what I’m most excited about. It’s not as noisy as we thought it would be either. I forgot to mention that.
dana
July 31, 2012 at 8:56 PMwow!!! Your stairs look amazing!!!!
scottiev
July 31, 2012 at 11:13 PMThank you Dana!
Cindy
July 31, 2012 at 10:33 PMWas your wood like contractor’s plywood or was it a better grade of flooring? They look wonderful!
scottiev
July 31, 2012 at 11:18 PMThank you, I’m certainly happy with the way they turned out. I was actually rather surprised with what was underneath. It was higher quality than I expected since everything about this neighborhood seems to have been built on shortcuts. It wasn’t stain quality, but it was smooth and I honestly think they are solid pine. I didn’t fill in all the dents since I figured the kids would add more. Scars add character….right?
Rebecca @ Shoved to Them
August 13, 2012 at 9:11 PMScars add character is the lie I tell myself every day. If you need me to, I’ll say it to you too.
Yes, scars add character.
Porch furniture makeover « My current compulsion
September 18, 2012 at 9:38 AM[…] Right around the time I decided to pull the carpet off the stairs and paint them (see that post here), I decided I could no longer live one more day with the burgundy floral cushions on the love seat […]
Good Time Charlie
June 26, 2013 at 1:22 AMWOW! I just saw your response. I can’t believe your response to my email had gone to my SPAM folder and I just now saw it! Your stairs were in far better condition than mine! We did not have hardwood, not even smooth ply wood, it is Alt Board, which is really, really strong, but there is no way to sand it smooth. We sanded, and sanded, and sanded, then I skim coated it, several times, each STAIR with join compound, then several coats of heavy duty primer. They are now pretty much paint ready. Your stairs came out fantastic! I love that your husband was like “whatever” on ripping up the carpet! And yes, it was the grossest experience. I would rip up every last piece of carpet in my house and put down nice flooring if I could. Carpet grosses me out!
scottiev
June 26, 2013 at 7:31 AMI’m glad it went to your spam folder. I was worried you just didn’t want to talk to me anymore. 😉 nah…technology has an attitude problem some days for me too…usually picking the ones I have so much going on it’s highly inconvenient. So glad you stopped by! My steps were in pretty good shape admittedly. I can’t believe you did that much work! I would have gone to the big box store and just bought new treads I think- laziness and frustration kick in when I don’t feel like I’m making progress. Maybe I would have just put on a veneer of some kind and painted that..kind of like people do with the risers?
I’m loving watching the transformation of your stairs and can’t wait to see what you do with the hallway! It’s looking fabulous! How are you planning on sealing the steps?
Thanks for stopping by! I’ve got to get to my entry closet and laundry room next. The entry closet probably has another family living in it.
How to Choose The Right Canister Vacuum Cleaner - Bentham-Open.org
November 23, 2019 at 12:39 PM[…] of the product that you are supposed to invest in. Be sure that you read the testimonials and best vacuum cleaner reviews from the other users online. This way, you can be sure of what you are actually buying. This way, […]
Porch furniture makeover - Saved by Scottie
February 14, 2020 at 10:13 AM[…] it just depends on the day. Right around the time I decided to pull the carpet off the stairs and paint them, I decided I could no longer live one more day with the burgundy floral cushions on the love seat […]
Painted Stair Railings - Saved by Scottie
March 24, 2020 at 1:02 PM[…] is reminding me of the parts of the house I would very much like to update. I am a big fan of painting steps and not a huge fan of golden oak. After looking at the cost of replacing the railings, my second […]