
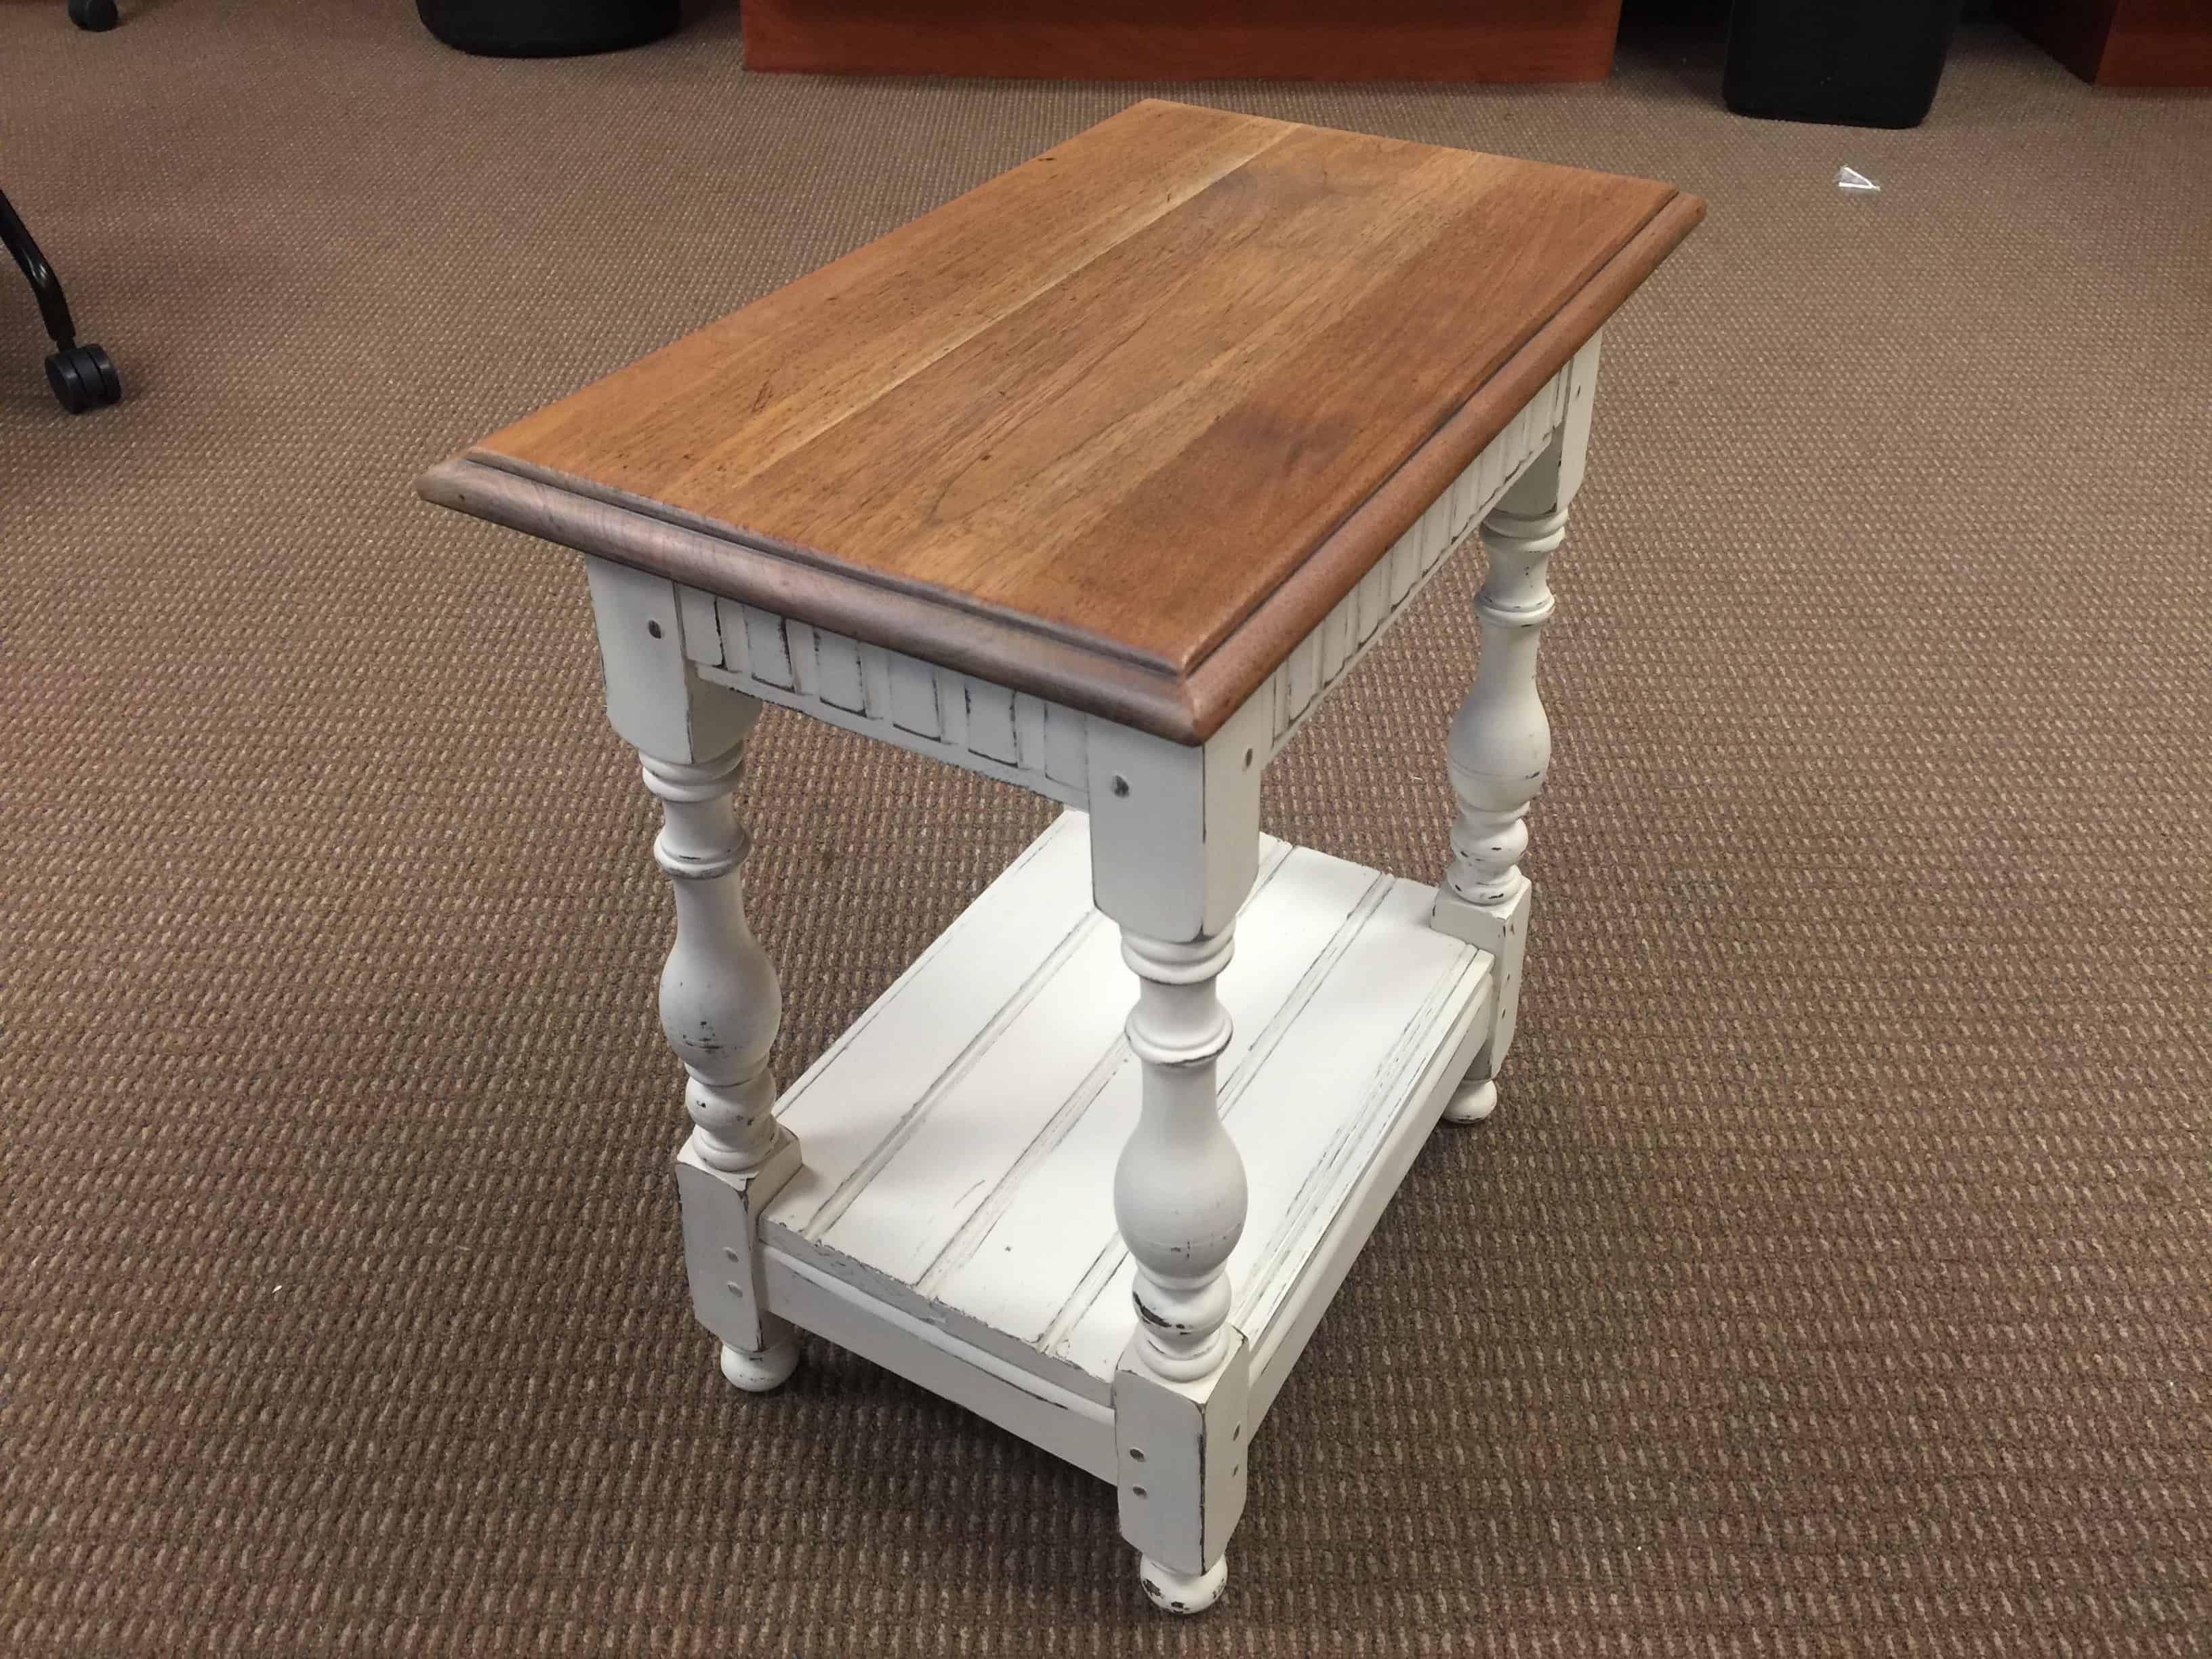
Recently I had a client bring me a table to update. She thought it was cute, but wanted it to go with her current decor scheme and thought a shelf would make it a more useable side table. I wish I had more pictures of the actual build, but here is the before (after sanding the top of course):

I sanded the old stain and sealer off the top. For the shelf I hit the clearance wood section at Home Depot (I love that section). I think I paid $1.90 for the board I used to make the shelf.

I used my Ryobi sliding miter saw to cut the flooring board to length and my Ryobi brad nailer with glue to secure the shelf in place. I stained the shelf with Shabby Paints Dark Cherry Gelato so after distressing it would be a similar wood tone, painted it with Shabby Paints Worn White. I distressed it all with wet sanding and sealed it all with VAX.

The natural color of the wood (walnut) was so lovely, I didn’t even stain the top- just sealed it with Sheer VAX. The result is a simple small table that now fits right in with the rest of her home.

Do you feel like you could give power tools a try ? Creating something someone loves is so much fun!
XO!

No Comments